 |
|
|
|||||||||||||||||||||||||||||||||||||||||||||||||||||||
|
|
|
|||||||||||||||||||||||||||||||||||||||||||||||||||||||
Fisher Sportscars ![]() can supply various styles for the bodywork:
can supply various styles for the bodywork:
You then have two choices of bonnet type:
The bodywork kit supplied by Fisher Sportscars ![]() comes in various parts. There is a bonnet, two side pods, main tub and the boot liner. My original plan was to paint the bodywork a metallic colour but, to reduce costs I'm initially going to use a plain coloured gel coat. Although the Fisher web site mentioned seven different colour finishes for the GRP gel coat, the resin for each car's gel coat is mixed specially for each car, so there is pretty much a free choice for the colour. An industry standard paint code needs to be specified to select a colour.
comes in various parts. There is a bonnet, two side pods, main tub and the boot liner. My original plan was to paint the bodywork a metallic colour but, to reduce costs I'm initially going to use a plain coloured gel coat. Although the Fisher web site mentioned seven different colour finishes for the GRP gel coat, the resin for each car's gel coat is mixed specially for each car, so there is pretty much a free choice for the colour. An industry standard paint code needs to be specified to select a colour.

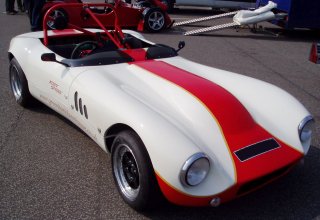
| This rather nice picture of a Fury being driven as intended shows the clear, plain aeroscreen I intend to fit to my car. |
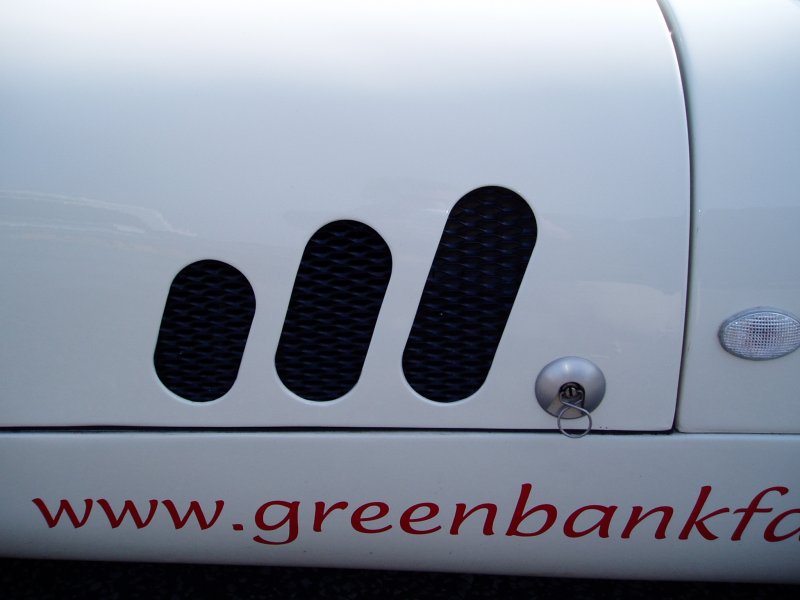
| These are some of the tidiest bonnet vents I've seen so far and don't require any special fixings. The mesh is just fixed from the inside. |
One thing looks pretty certain. I'm going to have to cut away some of the fibreglass at the front of the bonnet to avoid the wheels touching on full lock.
Bonnet Catches
Typically Fisher Sportscars ![]() use SVA compliant and rubber covered bonnet catches to fix the bodywork. I don't like the look of these things so I've bought some (shown in the picture above) made by Krontec
use SVA compliant and rubber covered bonnet catches to fix the bodywork. I don't like the look of these things so I've bought some (shown in the picture above) made by Krontec ![]() and which are available from Demon Tweeks
and which are available from Demon Tweeks ![]() . These come in three parts and as you can see, there are very expensive (Ouch, it's costing me £125 to hold the bonnet down!). They are easily the best looking solution I've seen though and are a very solid and light-weight solution too.
. These come in three parts and as you can see, there are very expensive (Ouch, it's costing me £125 to hold the bonnet down!). They are easily the best looking solution I've seen though and are a very solid and light-weight solution too.
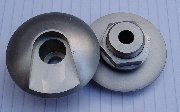
| The top (outer) part of the catch (part number KRNBP01/S). These cost £7.60 + VAT each. Two shown. |
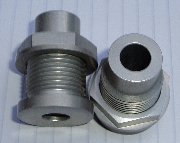
| The bottom (inner) part of the catch (part number KRNBP02/S). These cost £5.81 + VAT each. Two shown. |
|
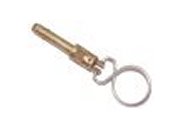
The quick release 'pip pins' are available cheaper from Speciality Fasteners |

| The Fury bonnet is hinged at the front, such that when fully open the nose touches the ground. This either chips the paintwork or people carry a piece of carpet around to rest it on. Simon's bonnet support is the best approach I've seen to solving this problem properly though, so I'm going to copy it. My support is made from 10mm aluminum tube though to save weight and filled with a short length of steel rod at the bent end and at the mounting point to add strength. I've also got some 10mm aluminium saddle washers (from a bicycle braking system) for the mounting bolt end. |

|
In order to protect the radiator and to finish off the overall look of the car I want to fit some mesh over the front air duct. My plan is to use some fairly large hole (10mm), stainless steel (1.6mm) wire mesh. This will provide decent airflow yet protect the radiator from the worst of what's thrown up off the road. You need a piece about 58cm (24") by 17cm (7") to cover this air intake. I bought a piece to do all of the intakes on my car (9" x 48") from Superdials |
The left side pod carries the exhaust. The inside of this needs to be lined with a heat reflective material and I glued this to the fibreglass. The heat reflective material is stuck using Evostik Timebond, which is a non-impact version of the normal Evostik. It comes in blue and red tins as a thick paste, and gives you 10 minutes or so to get the material sitting flat before it hardens.
The front end of the side pod is open and has a mesh grille, to block major objects going down inside and catching fire. It gets very hot inside this side pod. The rear end is also open to allow good airflow. On track days this can sometimes result in the rear-left tyre getting a bit warmer than the right, but this is never an issue on the road.
The exhaust needs to be mounted very carefully, so as to not be too close to the fibre glass. It will burn it if it gets too close. I typically run a 4.5" diamter exhaust which leaves a decent amount of space. My largest exhaust is 5" in diameter. I know some people that squeeze a 6" diameter exhaust into this side pod!
Some people drill holes along the underside of the sill to facilitate a good airflow over the exhaust but this doesn;t look good to me. To reduce exhaust heat into cockpit you can fit another a heat reflective panel on the outside of the chassis. Exhaust wrap is not recommended. There needs to be at least 25mm between the exhaust and the fibreglass and ideally 50mm.
My passenger side pod weighs 4.28kg with all the fixings and brackets on it. This side is heavier due to the inlet mesh and exhaust exit surround.
The drivers side pod is held on with rivnuts on the top face and 5mm bolts through the side sill on the inside of my car. I also use 5mm bolts at each end of the bottom edge, through the extended floor plate. I've used stainless-steel fixing but the rivnuts are zinc-coated steel and do rust.
The drivers side pod is removed far less often on my car, because they is nothing behind it. Havig built it in 2007, the first time I removed it was in April 2018.
My driver side pod weighs 2.92kg with all the fixings and brackets on it.

| I'm going for a 'Night Blue' (RAL 5022) powder coated chassis and roll hoops. |
| Simon Tait's R1 Fury was the inspiration for final finish and colour (and for a few other things as well). It is finished with a coloured gel coat in Rover 'Old English White' (paint code NNX) with a painted red stripe and vinyl gold tape over the joins. |
|
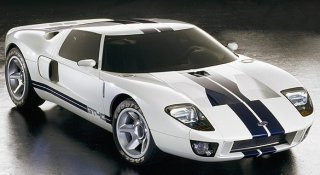
I'm planning to use 'Old English White' gel coat finish for the bodywork and the blue stripes from this Ford GT design over the bodywork and down the side pods. It will have 'Fury R1' written where 'GT40' is currently. My chassis and roll hoops are also 'Night Blue' to match the stripes.
The other option I'm considering is the reverse of this scheme, with blue bodywork and white stripes (also found on the Ford GT). |
I have a friend that prints custom stickers and he did all the work for my car for about £15! This includes the single, central stripe that runs down the middle of the car.
Along the top of the side pods I've added custom twin stripes with 'FURY R1' lettering at the front edge.
I've fitted a Fisher Sportscars ![]() bonnet badge.
bonnet badge.
I initially fitted an aeroscreen made from 4mm thick polycarbonate.
If the weight penalty is not too big, I may consider a full windscreen. These can be retro-fitted at a later date but you then have the hassle of adding washer jets and windscreen wipers. The weight of it all! Another downside of this plan would be that my wife may actually get in the car with me. This added degree of practicality will make road driving a more pleasurable experience though, just. It would be really good if the windscreen could be made interchangeable with an aeroscreen.
Update: April 2018 - I've not felt the need to do this yet! :-)
Sticking a normal front number plate on a Fury is not very easy. I'd really like to use a stick on plate but the DVLA ![]() web site is very clear on the subject. Still, I know plenty of people that use them and get away with it. The best source for stick on plates seems to be Fancy Plates
web site is very clear on the subject. Still, I know plenty of people that use them and get away with it. The best source for stick on plates seems to be Fancy Plates ![]() .
.
Update: April 2018 - I've been using a stick on front munber plate since 2007 without any issues.
Being hand crafted, the Fury body is not quite symmetrical as it comes out of the mould. All of the bodywork needs to put on together to assess fit and location before any of it is fixed to the car. This is done by what looks right and not by careful measurement, the latter being sure to frustrate. If not stored properly, the bodywork will move and warp so it is best to order it when you are ready to fit it. Typically, there is about a 2-3 week lead time on the bodywork.
The general consensus on the best way to fit the bodywork seems to be:
Fitting the body is always tricky on a kit car. Measure a little bit (wheel arch to wheel, etc), but in the end the body is asymmetric and you've got to use your eye and judge the best compromise. If you can, get the car in the open so you can walk right round it and see from all angles. Get a second opinion on the position, too - it's very subjective.
This is a non-silicone, non-wax hand glaze. It is used by hand to refine and fill swirl marks after machine glazing. This product has been formulated to work on all colours and can be painted over. It adds a wet look gloss to both GRP and painted metal bodywork, prior to waxing. It offers no protection to the bodywork finish at all. This stuff has to be seen to be believed.
To use: Start with a clean, freshly washed and dried vehicle. Shake the Imperial Hand Wax well, and apply to a clean microfibre towel or applicator pad. Using a firm circular motion, apply the glaze to one vehicle panel at a time, carefully spreading it in uniform consistency. With another dry, clean towel gently wipe clean. Polish entire car to a brilliant luster.
|
|
|
|||||||||||||||||||||||||||||||||||||||||||||||||||||||